Opening the offensive
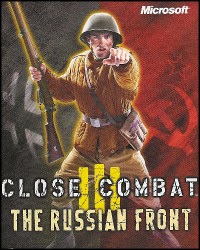 I said back in June that I was "going to master the first Operation on CCIII:TRF if it kills me". I procrastinated, as is my wont but eventually got down a couple of weeks ago to 'Blitzkreig: the War Begins', which links together the first 3 maps with which I am well familiar from previous battles with Close Combat: The Russian Front. I felt a bit intrepid: five days across 3 maps with a campaign system metagame of whose workings I have the barest clue- a whole new level of digital gaming ambition for yours truly. Sure, I can win the first map on autopilot, probably the second one too, but what unknown equipment might the Russians bring to the table, and what about factors like attrition, and resting and refitting? I could soon find my small platoon sorely depleted.
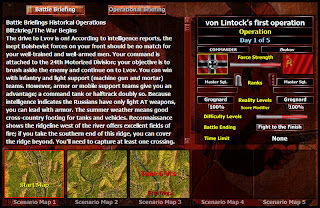
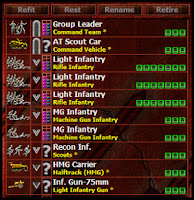 And the forces in Close Combat are pretty tiny, just your basic platoon with some support elements: a leader, 3 squads with 2 LMGs, a team and 3 support elements- 8 units and 2 weapons in terms of CC or ASL- the smallest of scenarios indeed. More than just easy to play in a comfortable hour or so this compactness is crucial to Close Combat's immersion because the game plays out in a time appropriate to the platoon-level engagement to which the game is scaled. More than that, the simple elements of each scenario distill nicely into concise tactical problems solveable by applying the basic principles of fire and movement and the use of terrain. Close Combat might be WW2 ground combat in miniature, but it's a perfect little miniature that still works like a charm. For all its simplicity then, Close Combat is still every bit as authentically detailed as any boardgame, if not more so- it is a computer game after all. And doing it real time, watching your pixelated dudes actually crawl across the map into unknown enemy territory? That's visceral in a way boardgames can't ever be!
Anyway, I checked what was available for requisition and quickly realised I wanted 2 things above all: scouts and armour support. So the Recon Infantry were a no-brainer, and the Sdkfz 250/10 was an easy choice, combining as it does recon and command (if it survived its recon mission, naturally enough). The Sdkfz 251/1 (sMG) HMG halftrack was cheap mobile fire support and the 7.5 cm le.IG 18 gave me a proper 'big gun'.
What went down
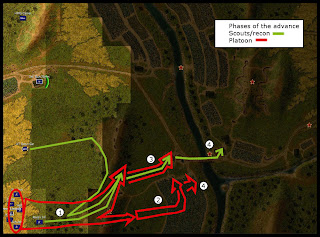
My position hinged on my infantry gun holed up in the farmhouse: the beast wasn't going to be moving so this was the best place to deploy it- with cover and a good field of fire. I just had to hope that the Russians couldn't swarm it with human waves- the crew would be dead meat if a squad stormed their building. My plan hinged on my scouts who led the way into enemy territory, staking out positions which were then established and consolidated by the squads following up. My manoeuvres unfolded in 4 discrete phases:
Phase 1
-
The scout car dashes forward hoping to draw- and survive, fire from the AT gun so as to locate its position; this seems to work.
-
The scouts lead the way in bounds to the lee of the hill, out of LOS of the expected Russian AT gun.
-
2 squads and an MG team follow.
-
Von Lintock, a squad and an MG team head for cover across the southern hill.
Phase 2
-
Von Lintock's section work their way across the open field into a field of crops, there to provide crossfire opportunities in support of Phase 3.
Phase 3
-
The scouts lead the way into the houses by the bridge, the jumping-off point for my attack on the bridge.
Phase 4
-
The scouts take the bridge while von Lintock's section move to a covering position.
The Russians fled the battlefield at this point. The secret to my victory- won with only 2/5 objectives, was my disciplined fire and movement. My men weren't charging blindly forward, they were moving carefully into occupied positions with plenty of covering fire. The inevitable Russian attacks were therefore swiftly dealt with at little cost.
Continuing the attack
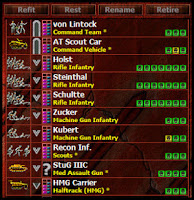 Hide-bound rules reader that I am, I was expecting some complications in the after-battle phase, but I got off lightly. All I had to do for the 2nd game was refit the damaged scout car, the mechanic for which I was able to discover without any difficulty. Looking at the map for the 2nd game I noted a lot of open country, precious little dead ground to hide my units once they'd advanced off their start lines, and even less cover. There was essentially only one way forward then- through the buildings to the southern bridge. I needed mobile heavy support for this and I was expecting enemy armour to boot so I quickly opted for the StuG. I kept the HMG halftrack.
What went down
Once again my manoeuvres unfolded in 4 phases:

Phase 1
-
The scout car makes a high-speed run around the southern farmhouses to discover that they're empty; it gets back over the hill but is KOd by a direct hit from the inevitable Russian mortar fire.
-
The scouts creep towards cover on the edge of the stream.
-
A squad and MG team move to cover the scouts.
-
Von Lintock and his section move to secure the farm buildings- the only decent cover in advance of their start line.
-
The armour moves up behind the crest of the hill ready for rapid deployment.
Phase 2
-
The scouts occupy the objective.
-
The armour comes over the hill and down into cover behind the buildings.

Phase 3
-
The tank duel: the StuG drives forward to attack a BT7, kills it, but is immobilised- still, it'd done its job.
-
The scouts work their way into a new forward position near the bridge objective.
-
The covering section rejoins the platoon.
-
The HMG carrier moves forward into cover.
Phase 4
-
The scouts grab the objective.
-
Squads move forward to cover.
-
The HMG carrier moves forward to cover.
The Russians fled the battlefield again. Solid fire and movement won me the day once more despite a plan that lacked focus- that separated section did nothing but waste me time (and probably cost a casualty or two). And I lucked in with the StuG, having lucked out when the damn BT7 just wouldn't come that little bit further forward into LOS.
Smooth victories aside, I was finding the game really rewarding at this point. I've rarely if ever used scouts in single games- you can get away with it because you're not worried about casualties. You can't be so blase about your pixelated subordinates in operations and campaigns because casulties reduce your long-term resources through refits and replacements. Proper use of scouts to reveal enemy positions and to lead a carefully phased advance turned out to be the solution to this problem in a way which just shows how well Close Combat's core engine encourages and rewards realistic tactics in a way all-too-rarely seen in comparable tactical board wargames. In fact tactical board wargames are often literally lamentable in this respect; that is to say, wargamers lament over how even the best of their cardboard tacsims so often encourage unrealistic tactics!
Setbacks, disarray and demoralisation
 It was too much to expect such plain sailing for the whole 5 days- I was going to have to face up to a Soviet supertank sooner or later after all, with nothing much better than a Panzer III to boot. And so it happened on day 3, when I took a whole platoon of 3 tanks- the StuG and 2 Panzer IIIs, hoping that weight of numbers and careful manoeuvring might win out against the Soviet superiority I was by now expecting to encounter. It didn't matter. There was literally nothing any of my tanks could do against the 2 KV1s which appeared, even from behind at close range during a vicious tank hunt in the streets of the village objective on the eastern map edge.
I either fled or got out with a truce, I can't remember now.
Day 4 also passed in a blur because I seem to recall that was the day I had to rest most of my infantry platoon. What I did with half a platoon on map #2 I can no more remember than my actual fate on day 3, but it was certainly no more heroic.
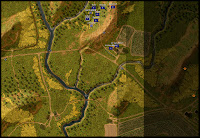 Day 5 saw more confusion- when I played a game without my rested troops because I hadn't figured out how to bring them back (and no- I didn't read the frikken' manual, d'oh!); then repeated desperation as I tried to figure out how to take down those pesky KV1s with the Flak 88 I'd realised was my only hope. I tried everything: sitting it on the northen hill- which proved that the gun could kill the beasts but that it'd never survive the ensuing Soviet mortar barrage long enough to kill them both; and hiding it behind a building (it can't go in buildings unfortunately) to give it the first shot- the mortars got it anyway.
I almost gave up but I decided to have one last go- I wasn't going to let that pesky machine get the better of me!
One last chance
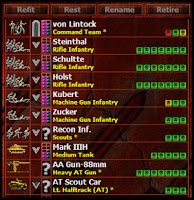 Essential Flak 88 aside, I took the mandatory recon and scout car, the usual light infantry platoon and a Panzer III to give me some armoured exploitation once the 88 had taken care of the inevitable Soviet supertanks. There was only one sane place to set up- out of sight behind the northern hill; and there was only one sensible thing to do there- hide until my hidden 88 had dealt with the KVs when they came into LOS at close range. The plan worked like a dream.
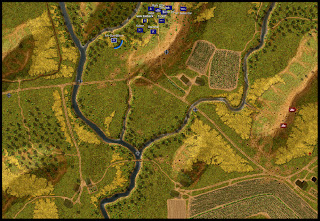
The KVs came forward slowly but surely, closer and closer to the moment of contact. The first came over the hill and was caught on the crest by a salvo from the 88. One down. I really started to sweat now- I wanted to crack this on the first try. And I was determined now to crack it! The second KV arrives and the gun duel begins- it's all in the lap of the algorithms now. Shots are exchanged as the tense moments drag on before the algorithms finally favour... me. The Soviet infantry died futilely assaulting the hill.
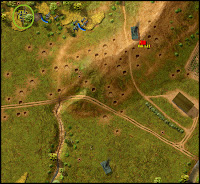
A 2-kill AT ambush combined with a reverse slope defence of the hill and the only unit of mine to move was the recon. A satisfactory end to the proceedings.
Afterthoughts
Whew, what a thriller! I really thought I'd had it for a while. And Close Combat's campaign system has revived my interest in the game. At its core it's still a solid implementation of my favourite subject at my favourite scale and level. It was the prospect of managing force depletion in the campaign system which drove me to develop recon tactics (which can easily be ignored in one-off battles), which paid off at both battle and operational levels and- most importantly, in the fun factor.
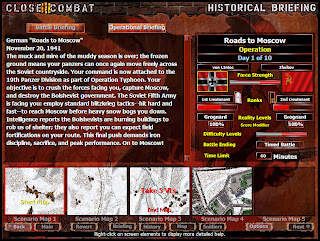
I'll definitely be back for more, this time braving the infamous Russian winter on the 'Roads to Moscow'. ;)
NB. You can read the fully illustrated version on RD/KA!@blogger.
Related@RD/KA!
Analogue gamer finally grokks digital?
- #1. In which I neither got nor 'get' computer games
- #2. In which, getting neither rules nor manual, I am confounded
 Games
Games How to resolve AdBlock issue?
